LCD Install
|
LCD Install
| |||||
|
| |||||
This is a brief overview of my LCD install that I purchased from theautoaccessories.com I am only using this page temporarily for those interested so I am sorry for the basic layout and tripod hosting... Before proceeding, as with all electrical installs, I would unhook the battery so you arent blowing fuses left and right, let alone shocking yourself.
| ||||||||||||||||
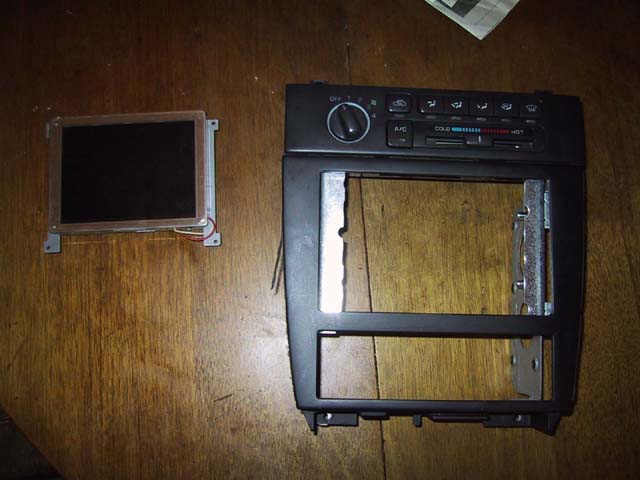
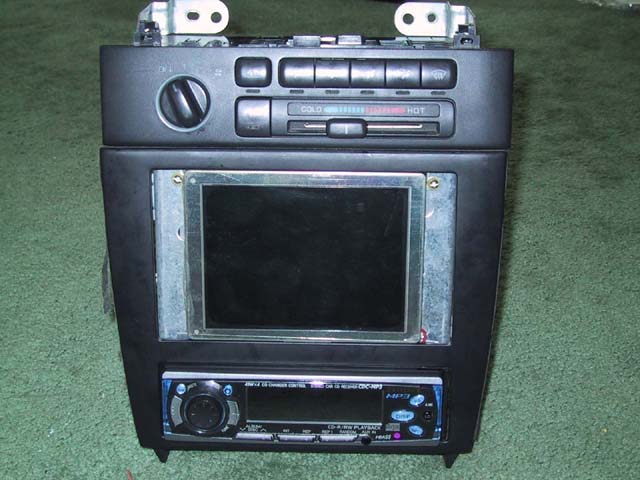
This first picture is of the pulled frame from the maxima (thanks installdr.com!) and the LCD. As you can see, there is part of the frame sticking out in the double din hole in the middle.
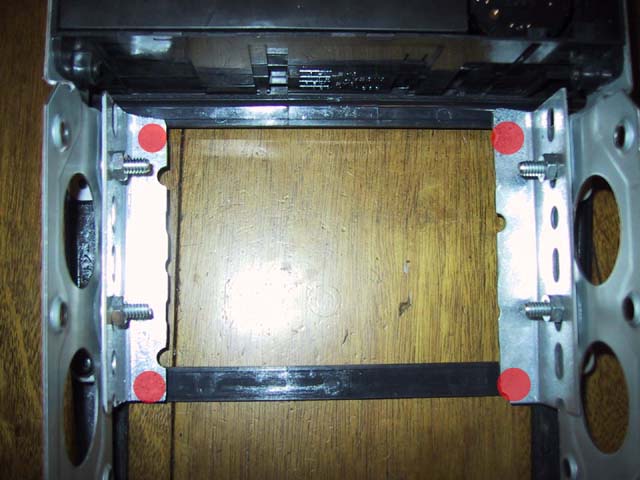
This is a picture from the back of the frame. You can see that I used a piece of angle iron to custom make the frame. Just by dumb luck, the holes in the angle iron align with the front-most mounting holes for cd/tape players, so I just attached it with a few bolts. The red circles locate the places where mounting holes for the LCD will need to be drilled. I recommend first mounting the angle iron and and getting the fit just right before drilling any holes (***MAKE SURE that the angle iron is flush with the bottom din slot if you ever hope to install a deck of some sort there. Also, many of the modern deck units that have fancy flipping and rotating faces will most likely cause some trouble. The problem is that for some reason the bottom din slot is a bit tight and you will have to use a dremel tool to shave it down. I used a sanding attachment that seemed to work quite well. Do this before you install anything because you will get little plastic shavings all over the place.***). The LCD should also be flush with the front of the console frame. Again this worked out perfectly with angle iron but you may need spacers. Once everything fits snugly and looks good, align the LCD and meticulously mark where you need to drill. Then remove the angle iron and drill away.
Now that everything is drilled... mount up! Hopefully everything aligns... if not see if you can fix it or just cut some more angle iron. I also made some clips that would hold the bottom mounts of the LCD in place since it was a very tight fit (meaning close to the bottom din slot which is needed open for the cd player). As you can see, they are just strips of tin bent in half but it works surprisingly well.
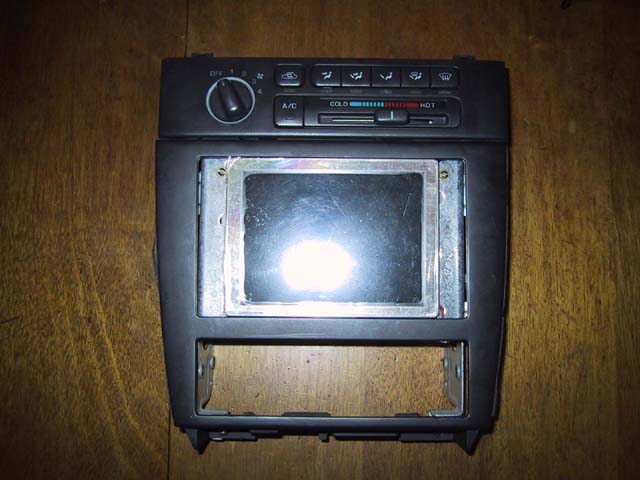
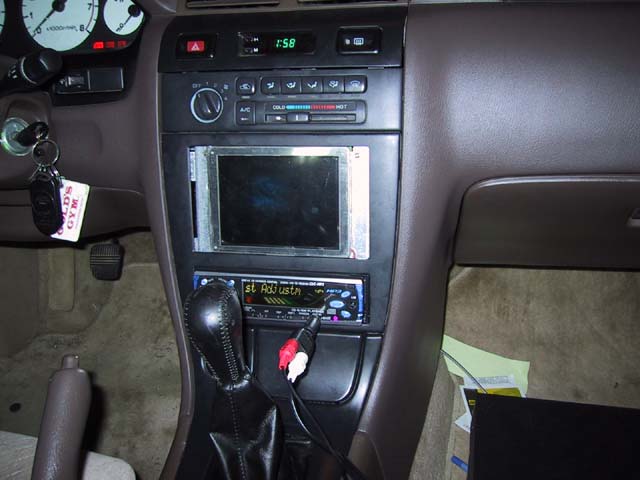
This is now what the unit should look like.
And this is the unit with the cd player installed. I would recommend testing the cd unit a final time at this point to make sure the face will flip down successfully. It sucks getting too far and having to backtrack...
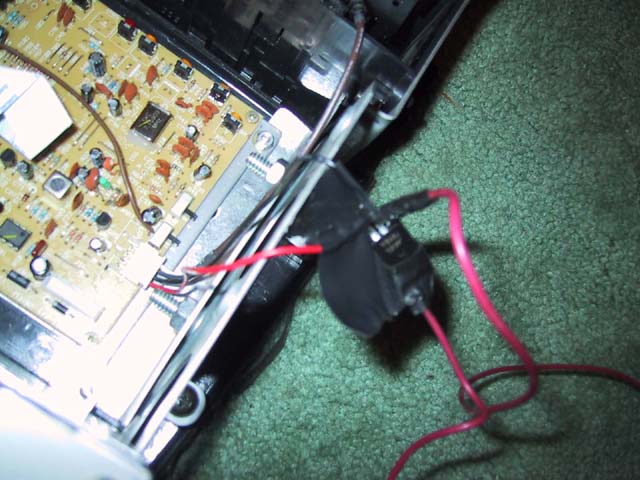
The next thing to do is to go to radio shack and buy a 12 volt regulator (the black thingy with wires coming from it... yes it is cheap) and some form of a switch (I suggest a rocker switch, another cheap item) to power the LCD. Don't forget to get those handy little wire splicing thingies (yes I like technical terms). I got the regultor so that I don't fry the screen in case the voltage goes whacko. This little item is easy to wire up and the diagrams on the package should be self explanatory. Once this is done, hold up and install the switch before splicing.
I know I said use a rocker switch, and I meant it. This little push button switch sucks. It sticks and is just plain poopy. I will have a new picture with the new rocker intalled (one with a light is cool). I decided that I would install the switch in one of the coin slots so I just popped it out and hacked away at it. Then, once the switch is installed, splice a wire from the 12volt ignition wire to your radio to the switch(this will go under the shifting console), and run a wire back under the console to the voltage regulator (if you have a lit switch, you also need a ground wire). Then you can just ground the grounds to the chassis or splice the ground wire (I recommend the former of the two options) and everything should be ok! Test it out (make sure you reconnect the battery and turn the key to accessory) and hopefully all is well.
Once you are sure everything works.. run an rca cable from the LCD out of the console (I chose by the left foot of the passanger) so that you can hook things up later if you don't already know what and where you are getting a video source from. Then you can reassemble the console and look at your finished product... oops! There are still two gaping holes on either side of the LCD. No problem, just be creative and think of something. Painted wood works fine, or plastic, or whatever. I hope this has helped people get started... and let me know if there is anything I should add. send email to: | ||||||||||||||||